The team at the Leon County UF/IFAS Extension Office shows us how to make a pond that will attract wildlife to our yards.
This is the first video I’ve edited since I’ve been isolating at home with the family. In the coming weeks, we’ll travel out in search of indigo snakes and check in on Saint Vincent Island (red wolf tracks, eaglets in nests, and rare lupines in bloom- oh yeah). But since so many of us are stuck at home, I thought I’d edit this one first. Because if we manage our yards right, there’s no reason we can’t see plenty of wildlife right out of our windows.
When I write about the home ecosystem, I usually focus on pollinators and insects of all sorts. But frogs and tadpoles would be cool. A turtle would be great. And having an aquatic environment would let us bring in a whole different group of native plants than we might already have in our yards.
Today, we’re building a wildlife pond.
More specifically, Rachel Mathes and the team at the UF/ IFAS Leon County Extension office are building a pond. Rachel’s going to guide us through the steps of creating a pond, both from an engineering and an ecological perspective. On the one hand, you’re creating a feature that will hold water, and you want it to maintain its integrity. On the other, if we want to attract wildlife, there has to be harmony between the living and nonliving elements of your pond, mimicking as closely as possible the nearby waterways with which their species have formed relationships over thousands of years.
With that in mind, we’ll start not with the hole in the ground, but instead by dragging buckets to Piney Z. Lake.
Attracting Wildlife- First, Find the Right Water
I meet Rachel and Mark Tancig by the Lafayette Heritage Park playground. Mark is our Horticulture Extension Agent here in Leon County. The two of them take buckets out of the back of his pickup truck and walk out onto the earthen dike that encloses a small part of Piney Z. Lake. They walk up and down the thin peninsula, stopping and looking. Mark is concerned about the look of the water.
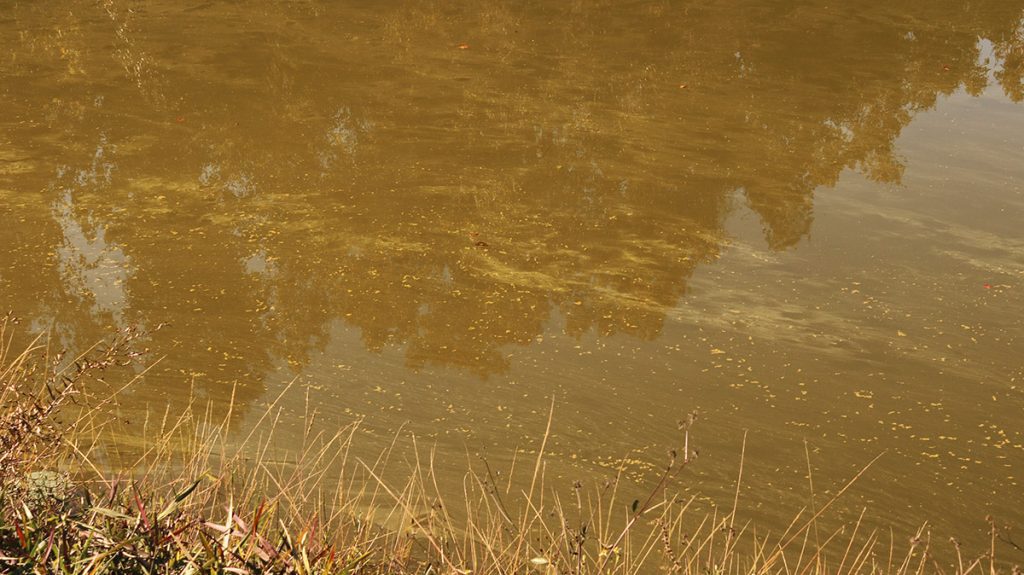
Piney Z. Lake has long had problems with runoffs and algae blooms, and the slimy looking turbidity of the water we see is troublesome. Perhaps this is not the water they want to collect for the wildlife pond.
This water is supposed to be the foundation of an entirely new ecosystem. We often think simply about these systems- plants and animals, affected by some underlying geology. But there’s much more going on that we can’t see, in the soil and in the water. We’re only just starting to understand some of the ways in which the smaller players- bacteria, fungi, single celled organisms and so on- connect with larger, visible organisms. But if we want to create a wetland that mimics our natural waterways, we need healthy water.
We drive to a pond Mark knows, closer by to the Extension Office. This water looks “clean.” I use quotes because the water is, in fact, mucky and brown. But to Mark’s eye, it’s mucky and brown in the right way. “There’s some good biota there!”
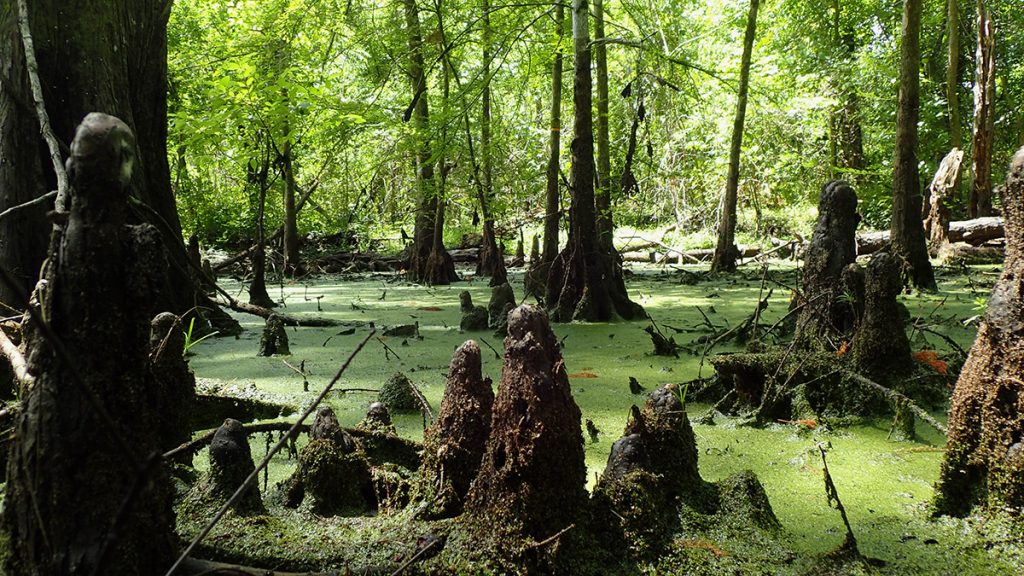
“So, this is all- it looks like muck, but we got a lot of duckweed.” Rachel says. Not everyone loves duckweed; it kind of looks like green scum on the surface of water, at least from a distance. But it’s a native plant that helps filter water. “We got all sorts of stuff we can’t even see in here. Basically it’ll start the ecosystem going in our new little wildlife pond.”
Making a Wildlife Pond | Step By Step
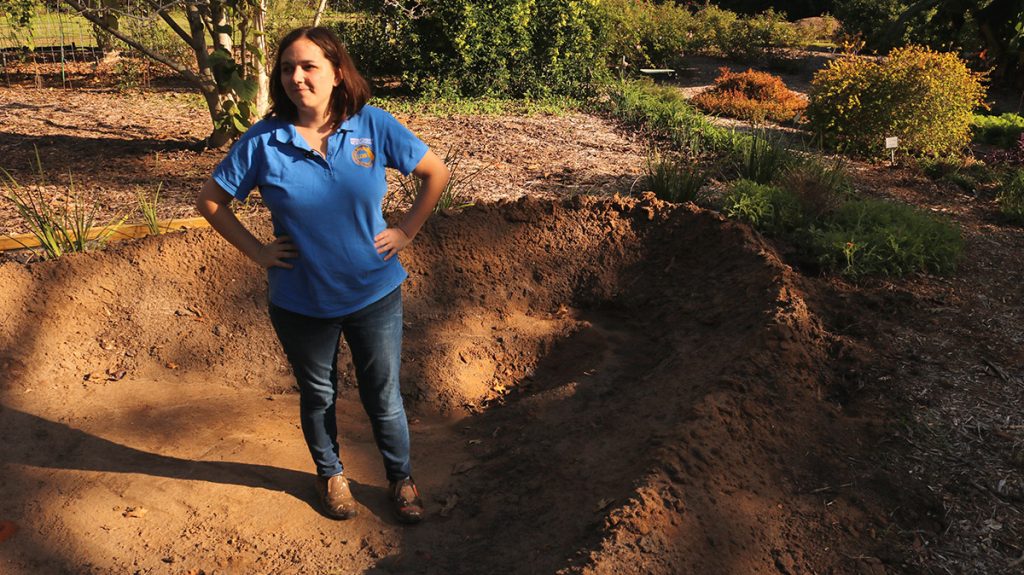
1. Digging the Pond Basin
When we get back to the extension office, Mark and Rachel stack supplies by a dirt hole in the ground. This is the pond basin. It’s a gentle slope downward to the deep end. Where it flattens out, Rachel has dug a hole a little deeper down, and next to that has also installed a shelf along the edge. This sits about a foot higher than the bottom. The deep end is at most a couple of feet deep, plus another foot in the hole.
Consulting the IFAS website for ponds and wildlife, the slope shouldn’t be any steeper than a 3:1 ratio. That is, for every three feet you walk into your pond, it should only get as deep as one foot. This will keep the liner from sliding off.
The small shelf she installed in the deep end is for potted plants.
Around the outside of the pond, Rachel has also created a raised berm. This roughly foot-tall wall forms a U, open at the shallow “beach” end. The berm will help contain water after a rain.
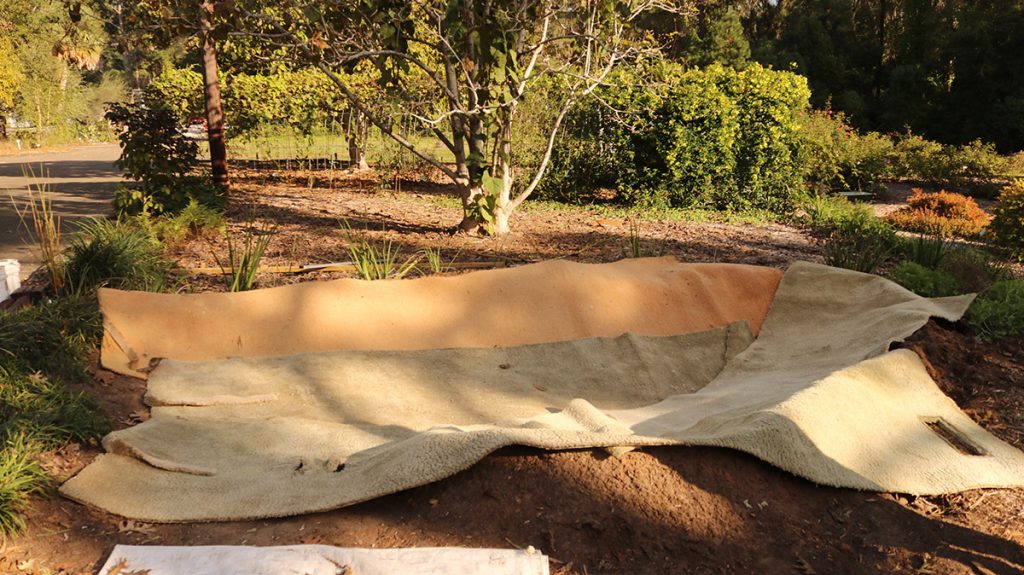
2. Pre-Line the Pond with Old Carpets
This is an optional step, but one that Rachel hopes will protect the liner they purchased for the pond.
“So we got these rugs at a local installer.’ Rachel says. After an installer puts in new carpet, they have to dispose of the old carpet. So here is an opportunity to obtain free material to repurpose. “These are obviously old and nasty and stained; they were just going to go to the landfill, and… be trash essentially.”
She and Dorie Spangler, 4H Program Assistant, lay the carpet fuzzy side up, and with a slight overlap between strips. It takes four strips to cover the basin and the berm. With a box cutter, Rachel cuts the carpet to better fit in the hole.
3. Line the Pond
The liner will keep water in the pond, as opposed to draining down out of it. Below, Rachel will explain a couple of other wet feature options that allow your yard to collect runoff and feed the aquifer. Each of these different home wetland types are better suited to different plant assemblages. And if you’re goal is to divert and filter runoff into the aquifer, rather than attract wildlife, you might consider something like a rain garden.
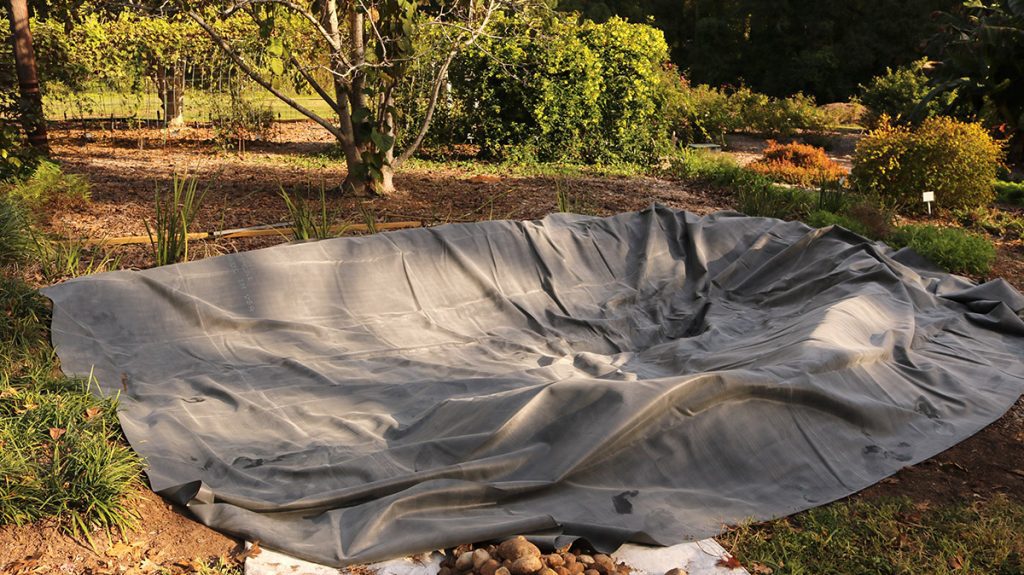
Rachel and Dorie now lay the liner over the carpet. They’re using a 45 mil EPDM pond liner, which is rated to last 20 years. Rachel hopes that by laying the liner on the soft side of the carpet, she can prevent sand and rocks from tearing and scratching it.
You can see she ordered enough liner to cover to the ground just outside of the berm. She’ll then cover that excess with dirt and large rocks, which will weigh it down and give it a more natural appearance.
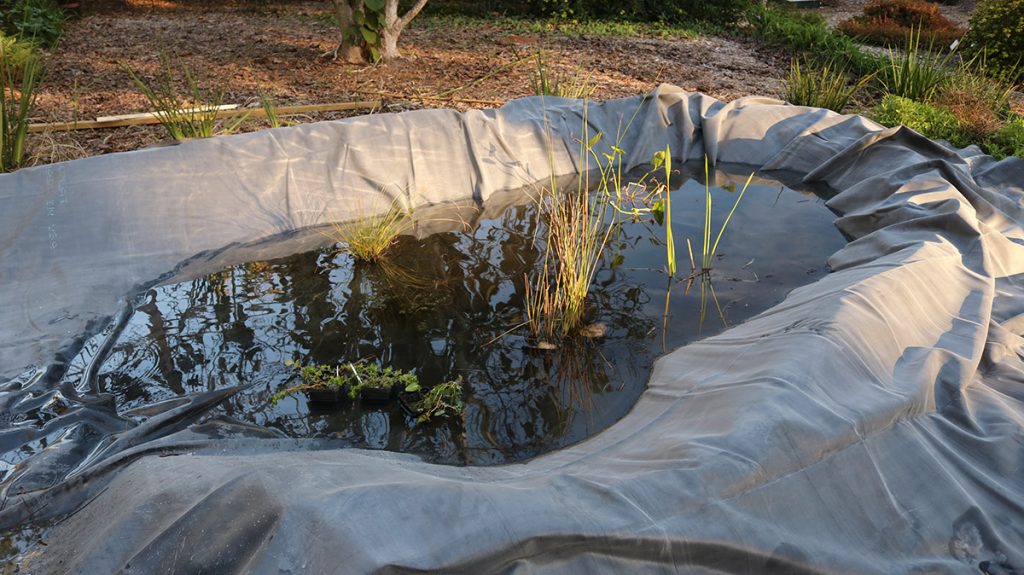
Next, they take their shoes off and walk around the liner, pressing the air from underneath it. As you can see, it’s still somewhat loose, but fitted to the contour of the pond. Now the pond is ready for water.
4. Filling the Pond
The Extension office has a large enough cistern to fill this pond with rainwater. This is ideal, as rain fills many of our waterways (and fills the aquifer, which in turn fills other waterways).
“If you’re making a pond at home, you can fill it with tap water, it’ll be fine.” Rachel says. Our tap water comes from wells drilled into our aquifer; so, again, rainwater. However, the City of Tallahassee treats its water with chlorine and fluoride, which would be harmful to wildlife. What tap water needs is time. “The chlorine will just gas off… it’ll just take a little bit.”
The next step is adding the pond water she and Mark collected earlier. As Rachel says, “We want to inoculate our pond with a lot of microbiota.” If you did use tap water, you might want to wait a couple of days before adding your pond or lake water, to make sure it has gassed off. Ideally, you have a clean natural waterway near your house, possibly close enough that frogs and other critters would migrate from that pond or lake to yours. And so they’d be used to the microbial mix in that water.
5. Adding Plants
This is the fun part. North Florida has a diversity of waterways, and no shortage of cool native plants to choose from. There are two reasons to choose native plants for your pond. One is that nonnative aquatic plants can be highly invasive. Another is that our local animals have a relationship to plants found locally.
Rachel selected a variety of plants for the IFAS pond, and each serves a different role.
“The completely submersed plants, those perform a function of being oxygenators.” Rachel says. “All plants put out oxygen; these plants will just put more oxygen into the water, which is what we’re going to need.”
Other plants will flower and attract pollinators. Others will be nibbled by insects. That might mean caterpillars, but also perhaps less sexy insects. Remember, everything from the birds to the frogs you want in your pond eat insects. We may love certain insects (those bees and butterflies) more than others, but a large diversity of small critters maintains the food web our better liked animals need.
Let’s take a look at some of the plants Rachel selected:
Coontail (Ceratophyllum demersum)
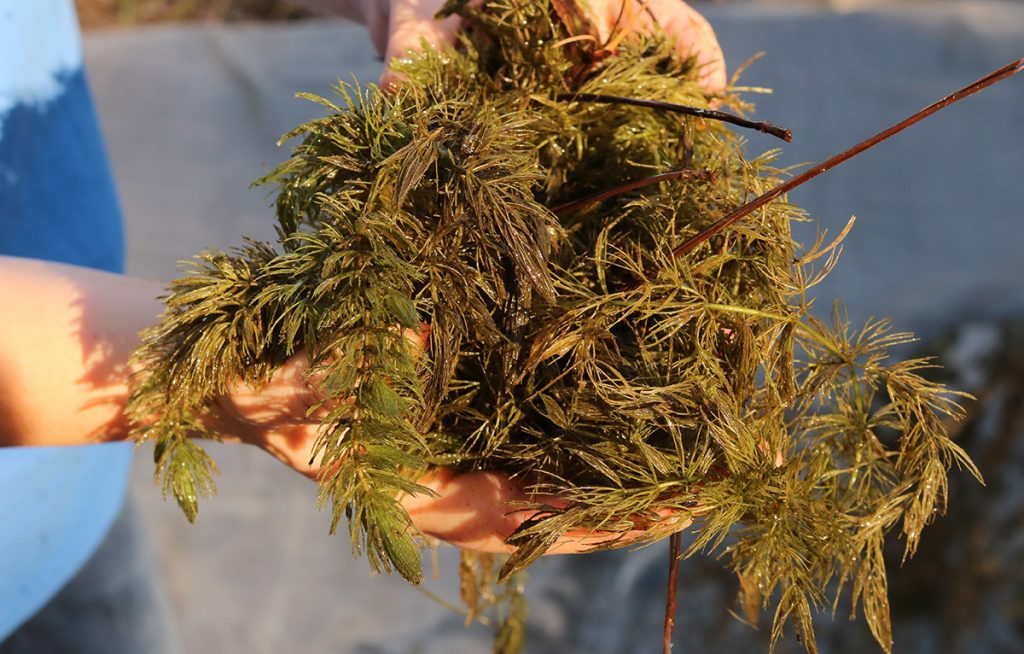
“This guy’s really great.” Rachel says. “It is a submersible, aquatic plant. And you’ll see this a lot in our ecosystems. You’ll probably see it a lot at, Wacissa Springs I’ve seen it.”
Lemon Bacopa (Bacopa caroliniana)
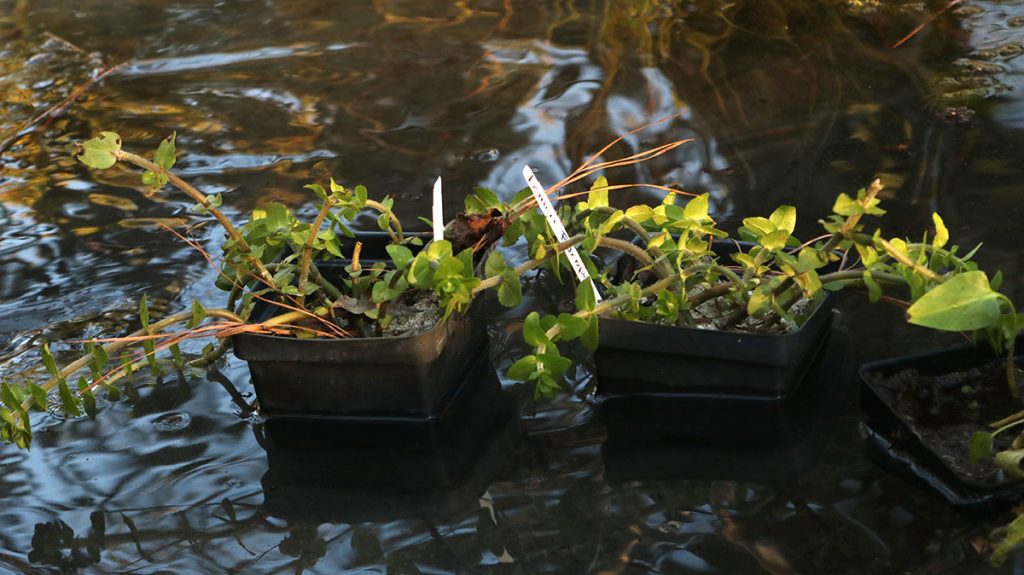
“They really smell like lemon.” Rachel says. “They’re beautiful. They are also slightly terrestrial, but they like their feet wet. They will go along the pond.”
Lemon Bacopa is an herb with thick, succulent leaves, making it a potential food source for wildlife. Its flowers are blue and white.
Pickerelweed (Pontederia cordata)
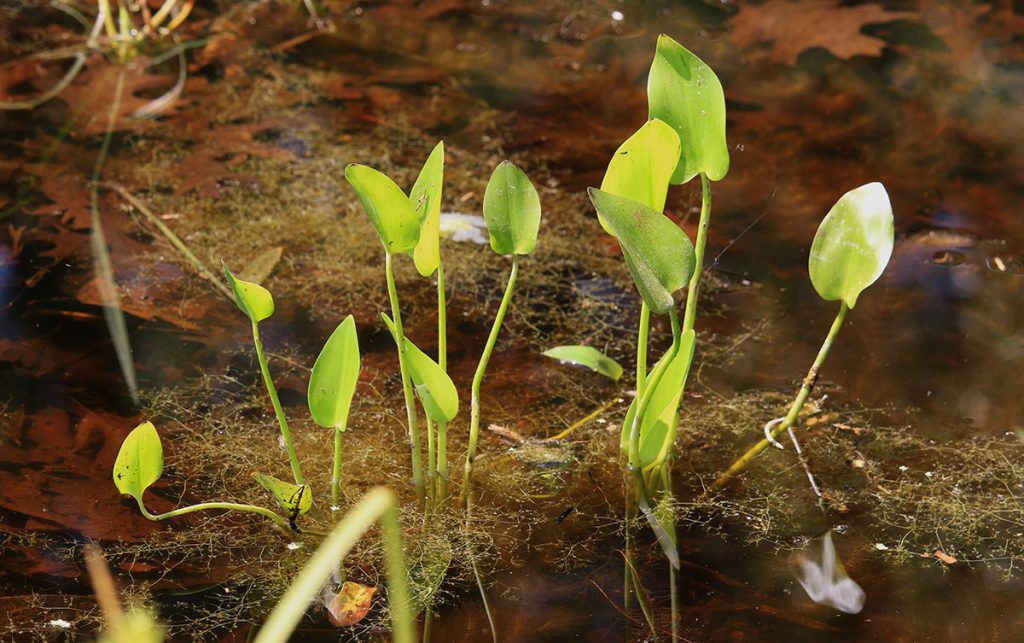
“This one is pickerelweed, another beautiful native aquatic plant.” Rachel says. “You’ll see this, again, out on the Wacissa, and many other water bodies around here. It puts out a really beautiful flower. You can see it has heart shaped leaves.”
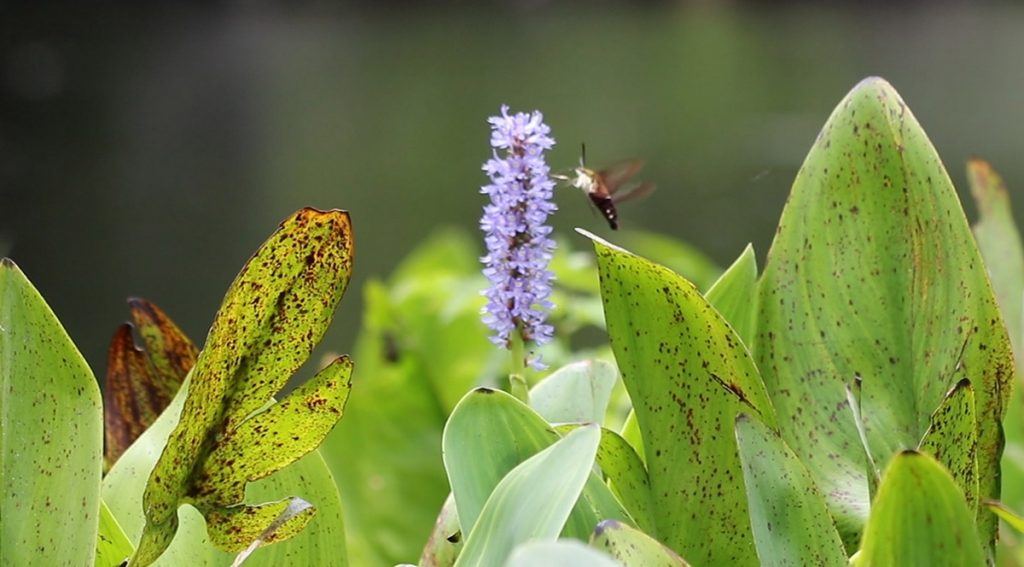
In the video, you can see juvenile moorhens on the Wacissa, swimming in front of pickerelweed, and a hummingbird hawk moth pollinating its purple flower. So it’s another plant that provides shelter as well as nectar for pollinators.
Path rush (Juncus tenuis)
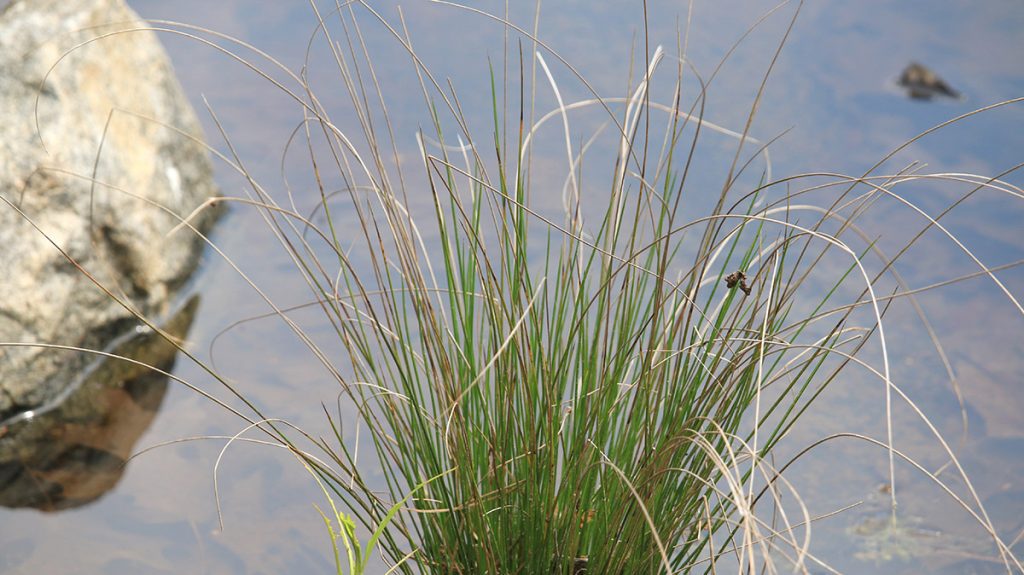
This is one of two rush species Rachel placed in the pond. While rushes resemble grasses, they are flowering plants. The two Juncus species she chose are different heights; path rush is the shorter of the two. Rushes can provide valuable shelter for wildlife.
Bulltongue arrowhead (Sagittaria lancifolia)
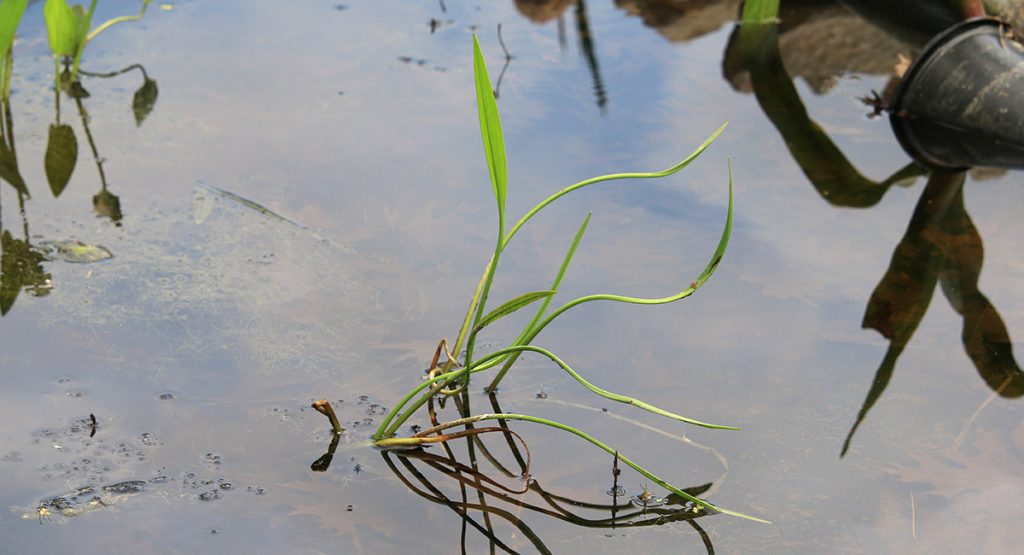
Another flowering plant.
A sedge in the Carex genus, likely Carex lupuliformis
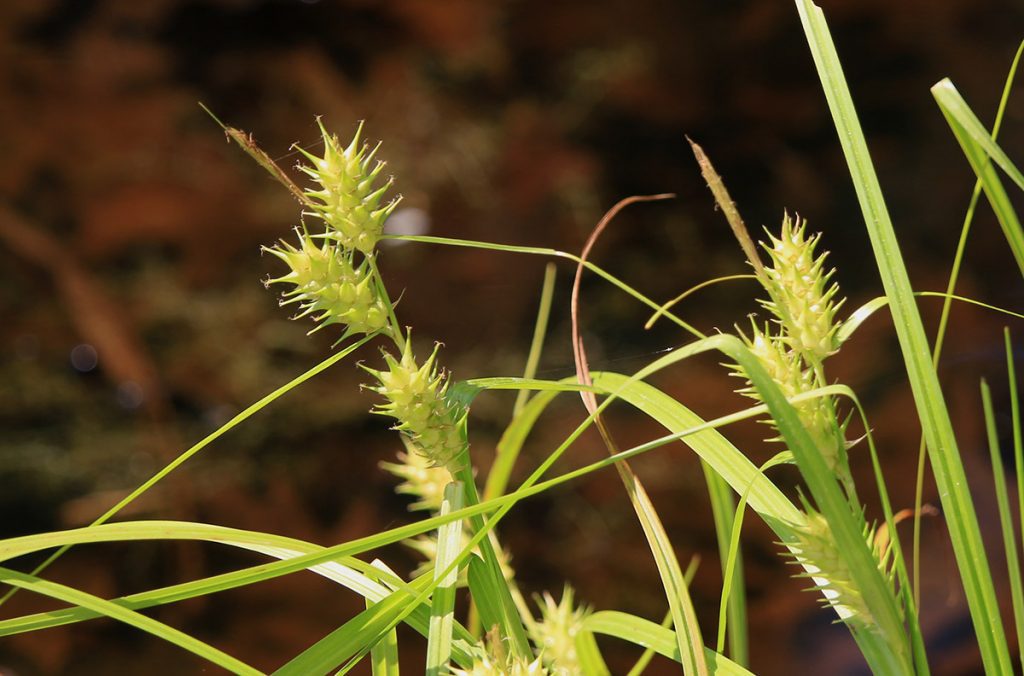
This is a plant Rachel added after our shoot day.
Spotted water hemlock (Cicuta maculata)
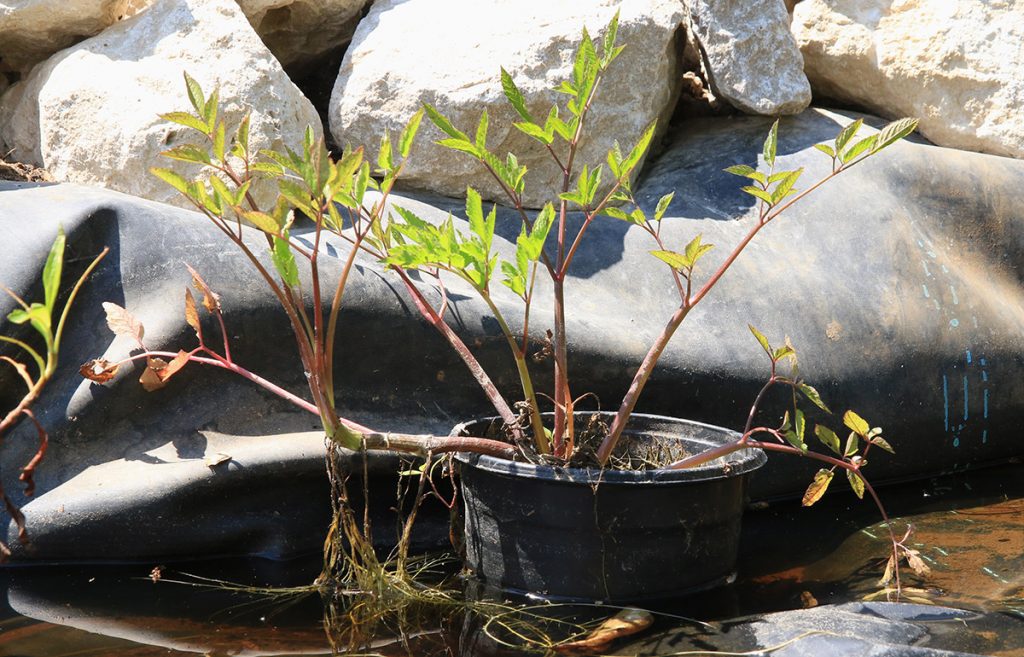
This is a shrubbier plant placed on the shelf in the deep end. It’s a poisonous member of the carrot family, and it puts out a similar display of flowers to the yarrow we’ll see in a second.
Blue flag iris (Iris virginica)
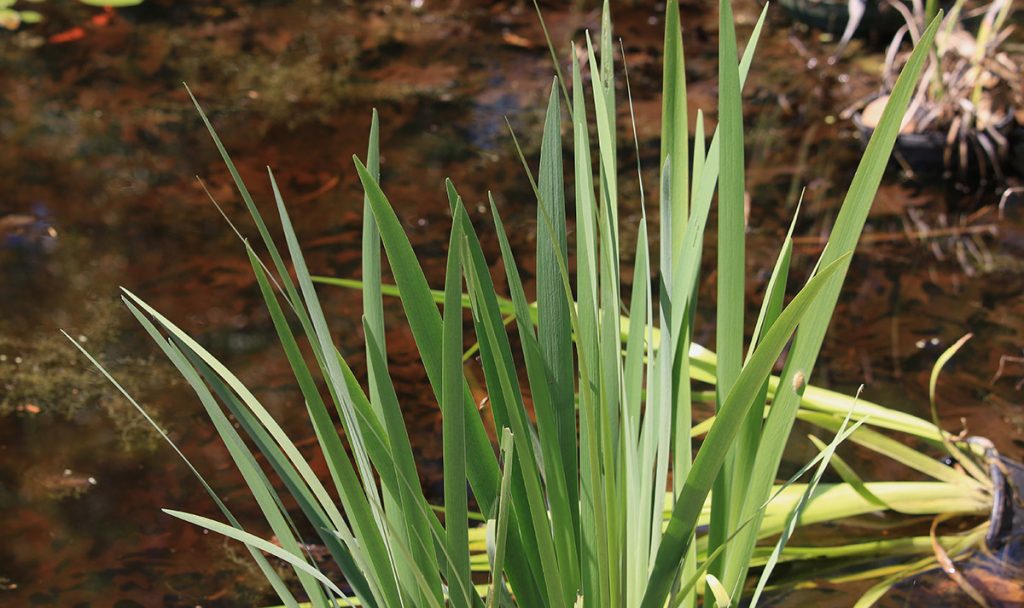
This plant is commonly used in rain gardens; here, it’s at the edge of the pond. It blooms in the spring, so it will hopefully be providing nectar to pollinators soon.
Yarrow (Achillea millefolium)
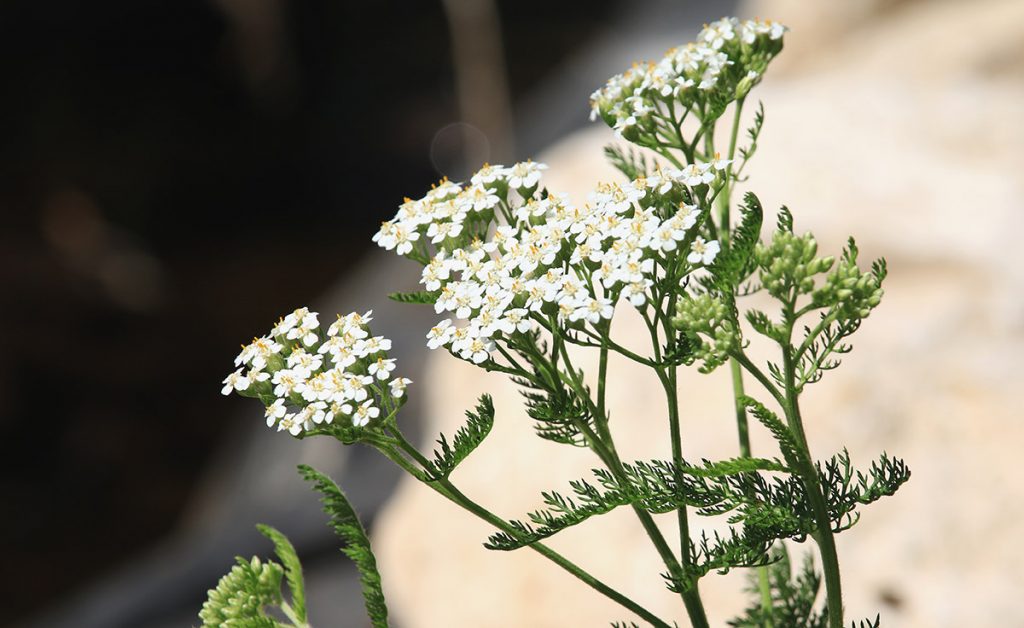
Another plant that the IFAS team added after the shoot day. This is planted along the outside edge of the pond. You can see how they selected plants that float in the water, plants that root deeper in the water, and plants that are rooted along the edge of the pond. The pond is further enhanced by the plants you place around the outside of the pond as well.
This is another member of the carrot family.
6. Make a Beach for Your Pollinators
After she placed her plants, Rachel started placing rocks of various sizes at the top of the slope.
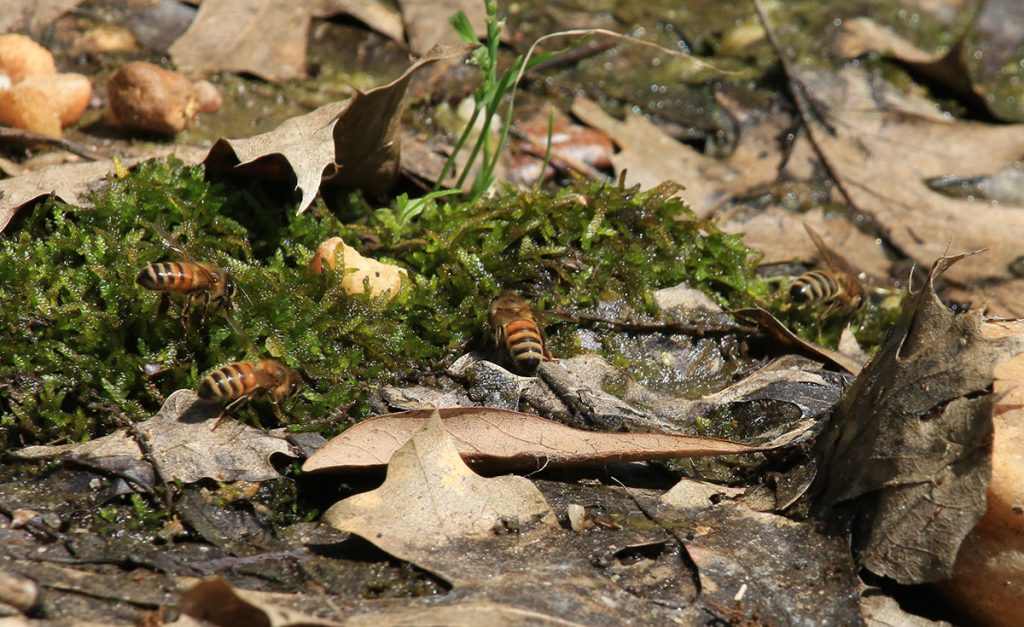
“We have some bees on the property, and we know they’re thirsty, just like all animals are.” Rachel says.”So I’m going to make them a couple little islands they can come to, and they don’t have to worry about drowning.”
We saw this at the home of Dr. Lee Bushong, a forensics professor at FAMU and a beekeeper. If you have a beehive, a few pebbles at the edge of a pond gives your bees a place to sit and drink. Rachel extended the beach a couple of feet away from the water, making a nice space for butterflies (including an American snout) to sun themselves. We know pollinators need pollen and nectar. But they need water as well, and butterflies need spaces to catch some sun.
I shot the footage with the bees and butterflies a couple of weeks ago. At that point, I didn’t see any tadpoles in the water, but it’s been dry. I’d be interested to see what it looks like after the next good rain, though.
What About All That Standing Water?
I think a worry a lot of us have when we see this much standing water is, of course, mosquitos. One solution would be a pump, to keep your pond water circulating.
“We’re going to try it without a pump because we’ve seen some research where pumps can suck in these small microorganisms, and they can kill them.” Rachel says. “By small- as big as a tadpole.”
They will research pumps in search of one with a fine mesh sieve over the intake, one that will prevent these organisms from getting sucked into the pump. For now, though, they’re trying a chemical treatment known as a mosquito dunk.
“That is a treatment you can do in your birdbaths or other places where there’s standing water like this, where the treatment will only affect mosquitos and black fly larvae.”
Rain Gardens and Bog Gardens
There are a few different ways for you to incorporate a pond/ wetland type area into your home space. We’ll briefly cover a couple that Rachel mentioned to us while shooting this video.
Rain Gardens
“The difference between this and a rain garden is that a rain garden isn’t wet all the time.” Rachel says. “It’s a great way to prevent a whole lot of runoff from coming down off of roadways and other impermeable surfaces.”
These are ideal for yards with low spots. The idea is to divert water from other parts of the yard into the low spot, and keep it from flowing on to concrete and asphalt surfaces. Impermeable surfaces end up transporting everything from lawn chemicals to the petroleum that gathers on roadways, ultimately flowing into our lakes, rivers, and sinkholes.
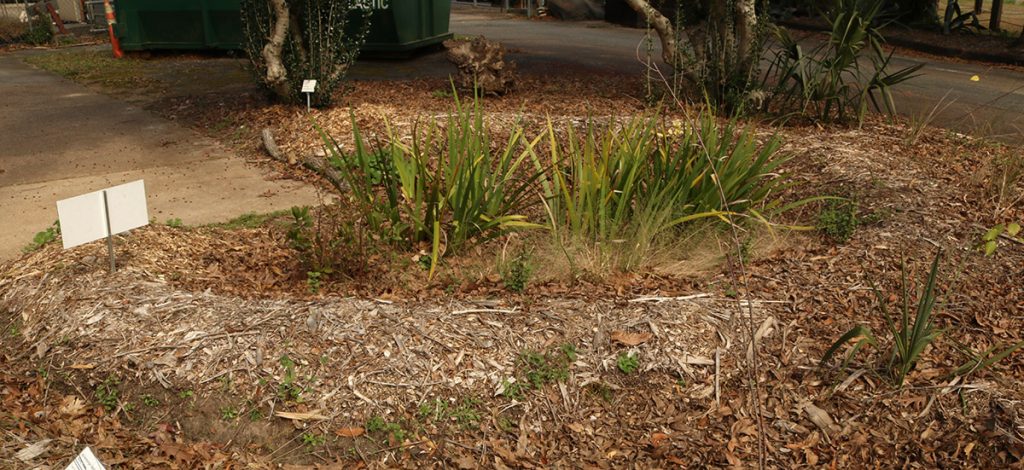
Much like those sinkholes, a rain garden will send water down into the aquifer. A rain garden, however, sends down cleaner water. Not only does it prevent water from collecting every nasty thing our cars leave on roads, but the plants will take in some of the impurities. And for those of us living north of the Cody Escarpment in Tallahassee (roughly the fair grounds, which as it turns out is next to the Extension Office), a thick layer of red clay will filter it as well.
As Rachel says, many of the plants in a rain garden would be different than what you’d put in a pond. “When it gets wet, the plants there like to have wet feet… Not completely aquatic plants, but not plants that like it dry either.”
TAPP (Thinking About Personal Pollution) has a page with more information about rain gardens, including a grant program for Tallahassee residents.
Bog Gardens
Maybe you’re into more exotic looking plants. Our area is home to a good diversity of carnivorous plants, which love wet, but not entirely inundated wetlands. According to Rachel, you would build this kind of pond in almost exactly as the one in our video. The biggest difference? You’d punch holes in your liner.
“If you have one of these liners that’s perforated,” Rachael says, “you can install a bog garden.”
These bogs typically sit in transitional zones between upland longleaf forest and waterways. Water drains through the bogs on the way to creeks or swamps. They’re usually moist, and sometimes slightly flooded. But they can also go dry enough for fire to sweep through.
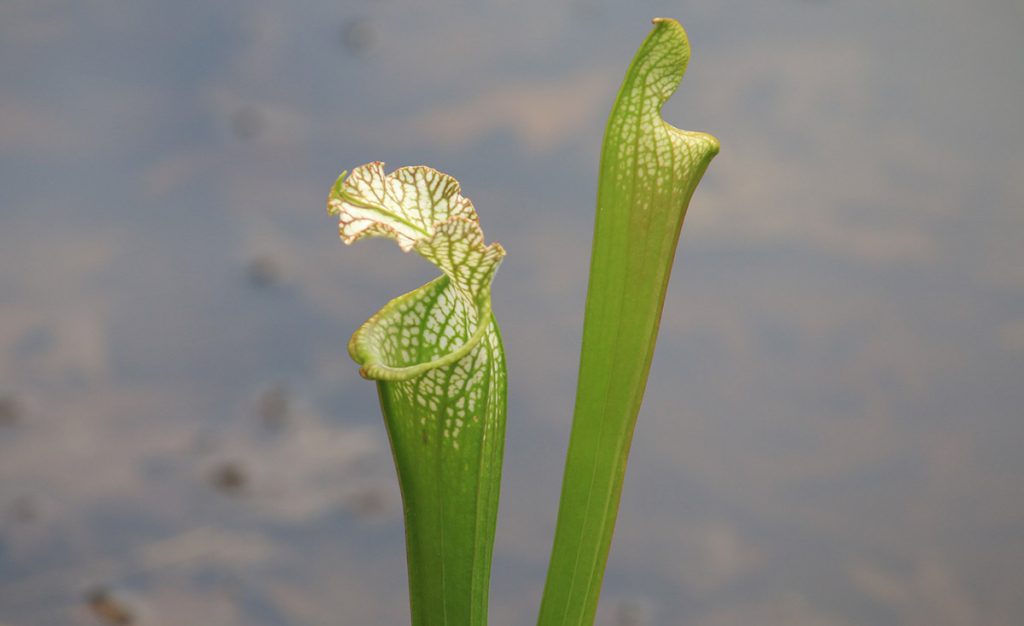
As it turns out, the IFAS team ended up adding carnivorous pitcher plants to the shallow end of their pond. It does add a nice flair.
Dig Deeper into Backyard Ecology
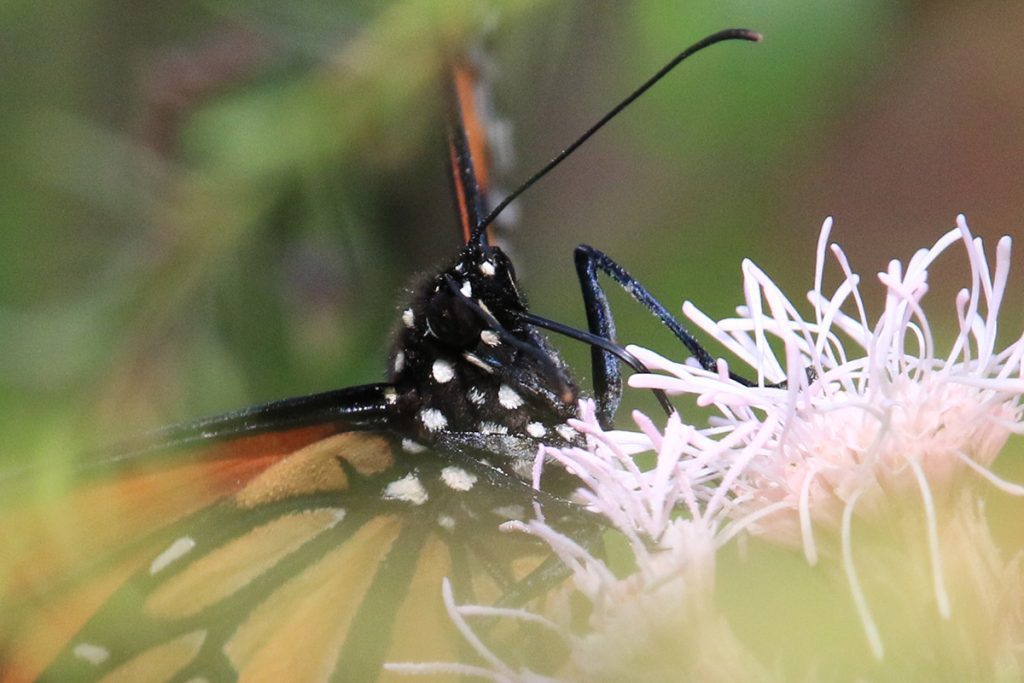
What can we do to invite butterflies, birds, and other wildlife into our yards? And what about the flora and fauna that makes its way into our yards; the weeds, insects, and other critters that create the home ecosystem? WFSU Ecology Blog takes a closer look.
